It is a basic WordPress feature to have categories organized on your blog. While you can easily create new categories, modify them and fill with different posts of your own, delete them or reorganize, there is always you can do more with them.
In this guide, we are about to show you four quick tips that will help you modify your categories a little bit more. Here’s what you can learn:
- Display entire category in a drop-down list
- Force WordPress to show empty categories
- Remove specific categories from blogroll
- Add nofollow to the category specific links in WordPress
Display entire category in a drop-down list
Yes, WordPress automatically creates pages for each category on your site. Once you load the page dedicated to a certain category, WordPress will instantly load latest posts from it. And while you can choose a category widget which will show all categories, you might be interested in listing all posts from only one category.
If you don’t want to deal with additional plugins which can help you organize categories or if you’re working on a new theme, modifying an existing one, etc. you might be interested in the code we’re about to show you.
This snippet will take the category ID which you should place in the variable and then find all published posts from it. The code will create a drop-down list where a user can easily browse through sorted posts. Once a user chooses a post, clicking on the “Go” button will load selected post.
Create a drop-down list and load posts from a category:
- Open sidebar.php or wherever you want to display the list
- Copy and paste the following code:
<?php
$cat_id = get_cat_ID('uncategorized');
$args=array(
  'cat' => $cat_id,
  'post_type' => 'post',
  'post_status' => 'publish',
  'posts_per_page' => -1,
);
$my_query = null;
$my_query = new WP_Query($args);
if( $my_query->have_posts() ) {
?>
  <form name="jump">
    <select name="menu">
      <?php
       while ($my_query->have_posts()) :
         $my_query->the_post();
      ?>
         <option value="<?php the_permalink() ?>"><?php the_title(); ?></option>
      <?php
      endwhile;
}
?>
    </select>
    <input type="button" onClick="location=document.jump.menu.options[document.jump.menu.selectedIndex].value;" value="Go">
</form>
<?php
wp_reset_query();
?>- Change category slug on the 2nd line
- Save changes
Now you can reload your homepage and see that there is a new list added on the sidebar or wherever you put the code. This list will contain all posts from the category you have selected.
If you like the list and you want to keep it on your site, you can go on and start modifying the looks of it via CSS code. Similarly, you can show the most commented posts from a single category.
Force WordPress to show empty categories
Category widget is, like many other features in WordPress, optimized for better user experience and website performance. That means that there are functions integrated to make WordPress smarter.
When it comes to categories, default WordPress settings will tell your system not to show empty categories. So, if you have created a category but haven’t put any posts in it, the widget simply won’t display the category on the list.
But what if you are just starting a blog and really want to show categories to let people know what they can expect in the future? Just as an example, you might have planned to have “movie reviews” category and already have it on your site, but if you haven’t assigned a post to it, your “movie reviews” simply won’t show on the list.
Instead of creating a dummy post just in order to show category on the list, you can easily change that and force WordPress (or politely ask it to do so by using your new code) to show all categories. There is a high number of parameters available which you can include into WP list categories code, but for now, you only need to worry about one – “hide_empty” argument:
- Open functions.php
- Copy and paste the following code:
add_filter( 'widget_categories_args', 'mytheme_widget_cat_args' );
function mytheme_widget_cat_args($cat_args) {
  $cat_args['hide_empty'] = 0;
  return $cat_args;
}- Save changes
Now you can go on and check your categories widget. As you may notice, there are now all categories, including those without posts, listed in your widget.
If you want to modify the WP list categories, you can modify the code to change any of the default settings. Check the list of parameters and edit them accordingly.
Don’t overfill your blogroll with categories you don’t need
When you start building your WordPress website, you’ll probably need several categories which will contain different posts. Usually, WordPress will show all those posts in your blogroll which can be found on the homepage. That means that every time you publish a post, no matter in which category it is sorted, the post will be displayed on your homepage.
But there will be times when you wouldn’t need posts from specific categories to be shown there.
Remove categories from blogroll:
Just as an example, you might have installed a plugin which will automatically publish YouTube videos in a new category you had created. Maybe you have used it to automatically publish movie trailers, but you don’t want to overpopulate your homepage with that category. You can find a different place to show those trailers (sidebar for example) and you will want to remove the trailers category from showing on the homepage.
This is just one example why not to show a category in the blogroll. You might have a completely different reason but we’ll show you an easy way to do that:
- Open functions.php
- Copy and paste the following code:
function wploop_exclude_category( $query ) {
  if ( $query->is_home ) {
    $query->set( 'cat', '-10' );
  }
  return $query;
}
add_filter( 'pre_get_posts', 'wploop_exclude_category' );- Find category ID
You can do that quickly by navigating to Posts -> Categories, and choosing the one you want to exclude from the homepage. Edit the category and find its ID in the address bar. The ID will look like this: category&tag_ID=45
- Replace that ID on the third line but leave the minus symbol next to it
- Save changes
That’s all it takes to remove a category from showing on your blogroll. You won’t be needing any plugins (although such plugins do exist).
If you want to exclude multiple categories from showing up on your homepage, simply add additional IDs separated by a comma:
$query->set( 'cat', '-10, -11, -12' );Now that you have excluded one or more categories from showing in the blogroll, you might be interested in showing posts from that category in a separate list.
Add nofollow to the category specific links in WordPress
What’s the difference between follow and nofollow:
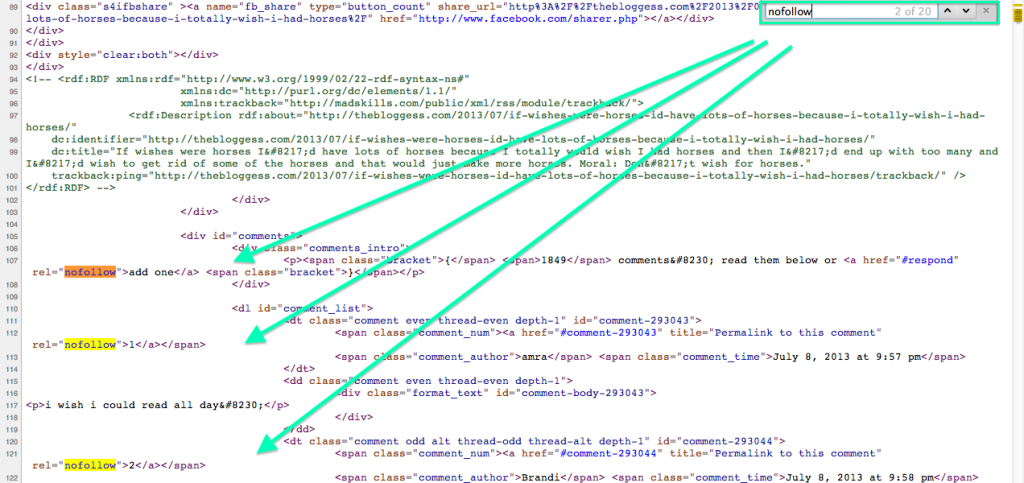
Let’s quickly see the difference between two kinds of links. While the regular links are followed and being indexed by search engines, addingnofollowto them simply tells search engines that you don’t want those links to count as important to a page rank. So, if you put nofollow links to comments, spammers wouldn’t have many benefits from it.

But, after nofollow was introduced in 2005 as a solution to stop spam, people found a way to take advantage of the new idea. They would place a nofollow link to certain pages just so their other pages would get more attention from search bots. And that’s where smart people who work for search engine companies had to make another change. Back in 2009, they decided to change the way Page Ranks were calculated.
Now you might wonder why even care about nofollow links if they won’t be recognized by search engines. Well, even if the link isn’t recognized by a search engine as important, it doesn’t mean that link isn’t important to you. You can still get referral traffic from it, and adding the noffolow to it will only stop search engines from following it. Simple as that.
In order to stop spam, WordPress will automatically assign nofollow to all user-submitted links so you won’t have to worry about that.
While you might want to keep many of your links available for search engines, there will definitely be those you want to exclude. For example, you probably don’t want paid links, comment section or links in your forum to have follow on them. That’s when you need to edit HTML code a little bit.
Add nofollow to a single link:
If you need to add nofollow to a single link, you can do that easily by adding rel=”nofollow” to it:
<a href="http://www.yoursite.com/" rel="nofollow">Link Text</a>Add nofollow to the entire category:
But if you want every link in the entire category not to be followed (maybe you have a category dedicated to paid articles), you will need the following piece of code which will tell WordPress how to handle the links:
- Open functions.php file
- Copy and paste the following code:
function nofollow_cat_posts($text) {
  global $post;
  if( in_category(1) ) {
    $text = stripslashes(wp_rel_nofollow($text));
  }
  return $text;
}
add_filter('the_content', 'nofollow_cat_posts');- Go to Posts->Categories
- Choose a category and open it
- Find the ID number in the URL
Use the ID in the 3rd line of code and change that number found in the brackets:
if( in_category(1) ) {- Save changes
Don’t forget; nofollow links are as important as the follow ones – not every link needs to be your ladder to a page rank. And don’t forget that modern search engines have complex methods of calculating the importance of your site, so don’t be afraid to use nofollow links where you need them.
In Conclusion
Technically, it is possible to have a WordPress blog without categories. But in most cases, having an organized website through categories is an essential feature. So, while you are already on the topic, make categories as best as possible, and consider implementing some of the features we covered in this guide.


