Main method you will be enabling your website to support different features is by adding, editing or removing plugins. Plugin is a installable feature that will allow different functionalities to be enabled on your website in order for your users to benefit from these.
This tutorial will provide you with detailed information on how you should add, edit or remove a plugin from your WordPress web-site.
Install new Plugin
In order to add a plugin you should login into your WordPress admin area and then navigate to Plugins>Add New.
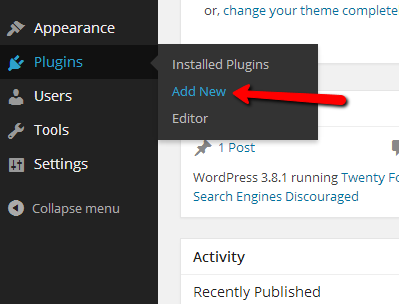
You will be redirected to a page called “Install Plugins” where the installation process should be managed from.

In order to begin installing a plugin you will need to determinate if you are going to upload the plugin or search for the same via the provided search tools on that page.
If you would like to upload a plugin this will mean that you have the plugin installation archive downloaded on your local computer. You can download plugins via the Official WordPress website’s Plugin section.
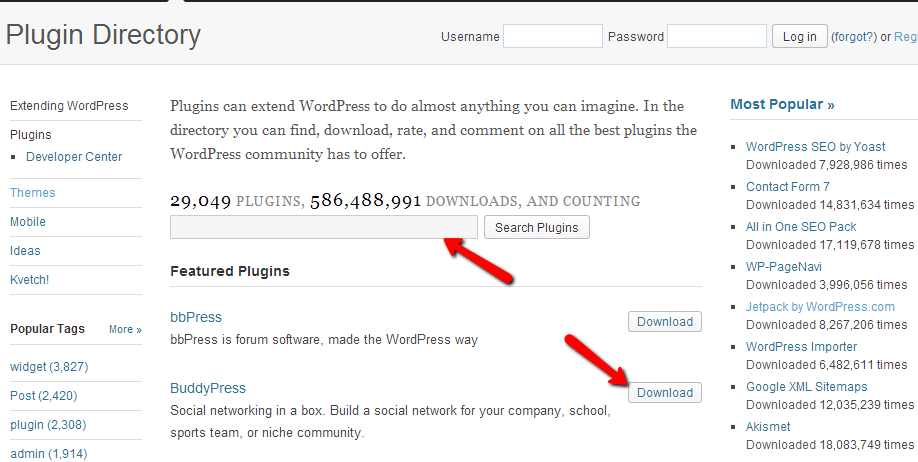
Once you press the download button you will be provided with the installation archive for the plugin you have chosen.
In order to upload that archive you will need to use the Upload method from the Install Plugins page.

Then you will be redirected to an interface where you will be able to upload the already downloaded plugin installation archive by simply pressing the Choose File button.
Once your plugin is selected the Install Now button will become available and you will need to press it in order for the plugin to be installed. After a brief installation process which will be shown at the next page your plugin will be successfully installed.

You can either choose to activate the plugin immediately or to return to the Plugins home page for example if you would like to add more plugins before you activate them.
Another option you can consider is searching for a plugins directly from the options provided at the Install Plugins page.
By simply inserting the search term you would like to search for and pressing the Search Plugins button you will be redirected to a page where all of the found modules related to your search term will be displayed.
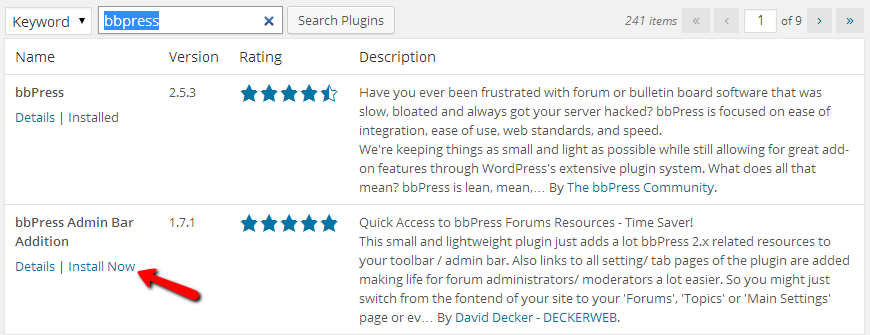
If you would like to install a plugin from the found plugins please use the Install Now button which will respectively install the plugin immediately.
Edit or Delete a Plugin
The second part of our tutorial will show you how to edit or delete already installed plugins from your website. Assuming that you are already logged into your WordPress admin area you will need to navigate to Plugins>Installed Plugins.
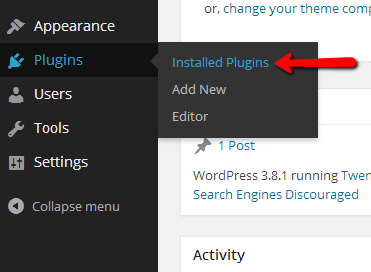
On the page you will be redirected to all of your currently installed plugins will be displayed. In order to delete a plugin you will need to first make sure that it is deactivated.
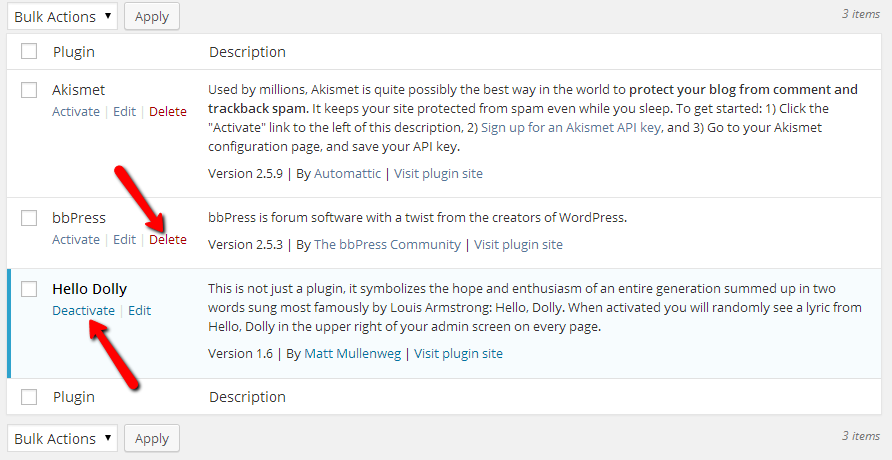
And if it is deactivated your will be presented with the Delete link which will be in red color. By visiting the Delete link for the module you would like to be deleted you will be redirected to a page where a confirmation will be required for the plugin to be deleted successfully.
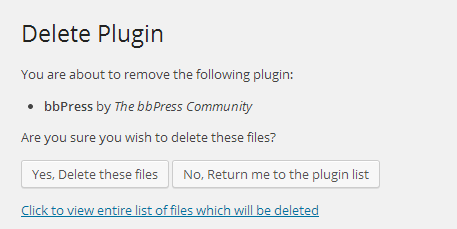
Be aware of the fact that all of the plugin files will be deleted without the option for these to be restored. Thus if you have made some custom modifications on the code of the plugin they will be also removed with the plugin deletion.
Once you are ready to delete the plugin simply click on the “Yes, Delete these files” button and the plugin will be permanently deleted.
Last but not least if you would like to edit certain plugin this can be easily achieved by navigating to the Installed Plugins or just Plugins page and visiting the Edit link for the plugin you would like to edit.
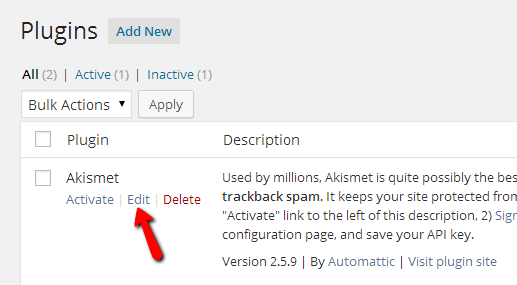
The editing of a plugin by default will redirect you to the code of the plugin you would like to edit. The changes there depend entirely on your needs and in order to perform these you will need to know how exactly the plugin you are editing works.
Note that some plugins are providing a convenient web interface for editing their functionality.
Congratulations! You can now fully manage the plugins of your website!
