The WordPress functions.php file is one of the most central files of any WordPress installation. It can control much of the functionality and behavior of your website. We hope that this article will let you know what a function.php is and how it works.
In the following, you will learn what the functions.php is, where to find it, and what it can do. After that, I will talk about the file’s pros and cons and close the article with a few example code snippets that you can input into functions.php to enhance your WordPress website.
What is functions.php and what does it do?
The functions.php file is part of pretty much every WordPress installation. More specifically, you can usually find it in the directory of every theme installed on your site (including child themes).So what does this ubiquitous file do?
The functions.php file is kind of like a theme-dependent plugin. You can use it to add any kind of functionality to your site (like plugins do). However, because functions.php is part of your theme, your changes will only be active as long as the theme is, whereas plugins work no matter which theme you’re using.
To do its job, functions.php can contain PHP code as well as native WordPress functions. If you know your way around things like theme hooks, you can even use functions.php to create your own hooks!
Because it can contain all types of code snippets the functions file is very powerful. Let’s next discuss when to use functions.php and when not to.
Pros and cons of using the WordPress functions.php file
So, functions.php basically works like a plugin. However, it doesn’t just do one specific thing. Instead, the file can be a collection of code for many different purposes. For example:
• Creating widget areas
• Adding new image sizes to your site
• Changing the text of the ‘read more’ link
• Adding custom fonts
As you can see, the file is extremely flexible. For that reason, if you want to make small changes to your site, the WordPress functions.php file is the perfect way to accomplish that.
On the other side, it also has its limits. First and foremost, if there is any small mistake in the file (such as a missing semicolon) it can take down your entire site.
Plus, if it’s the only way you make changes to your site, the file can quickly become chaotic and confusing.
Finally, as you learned earlier, if you ever switch WordPress themes, you’ll lose the changes in your functions.php file.
Alright, now that you know all about this important file, you can start using it. Below, you will find a few code snippets that you can copy and paste to your theme’s functions file (with site-specific customizations, of course). The best way to use them is to paste them at the end of your functions.php file.
1. Add Google Analytics to your site
Adding Google Analytics to your site is always a good idea. It will help you understand your audience better and track their behavior on your site so you can improve it.
Usually, you would include Google Analytics on your site via a plugin, however, it’s also possible to do it manually via the WordPress functions.php file. Here’s what that looks like:
function add_googleanalytics() { ?>
          <script async src="https://www.googletagmanager.com/gtag/js?id=XX-XXXXXXXX-X"></script>
          <script>
            window.dataLayer = window.dataLayer || [];
            function gtag(){dataLayer.push(arguments);}
            gtag('js', new Date());
            gtag('config', 'XX-XXXXXXXX-X');
          </script>
<?php
}
add_action('wp_head', 'add_googleanalytics');
To make the code snippet work, you need to replace everything between <script async… and the final </script> with your own Google Analytics tracking code.
2. Hide specific WordPress login errors
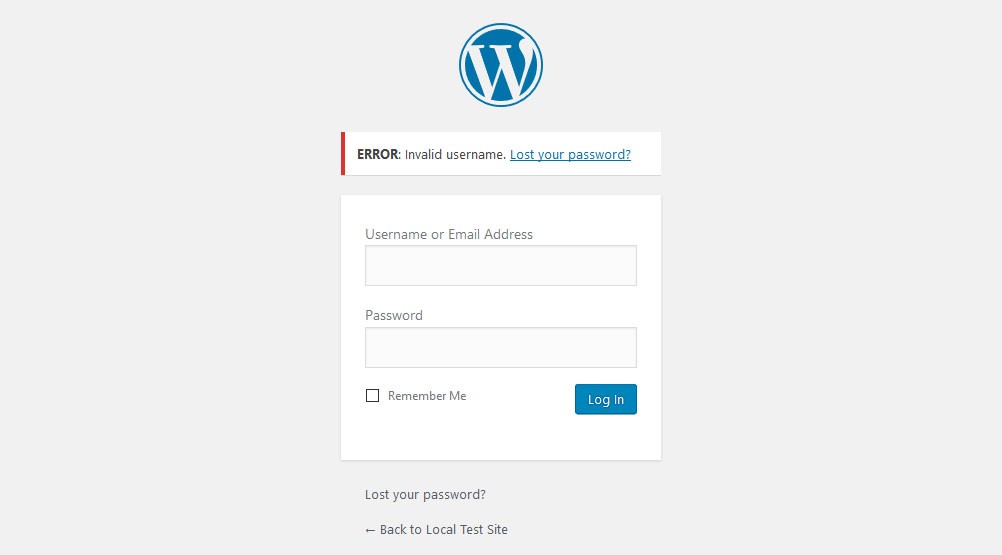
When somebody tries to log into your site with faulty information, WordPress will tell that person whether the problem is an invalid username or an invalid password:

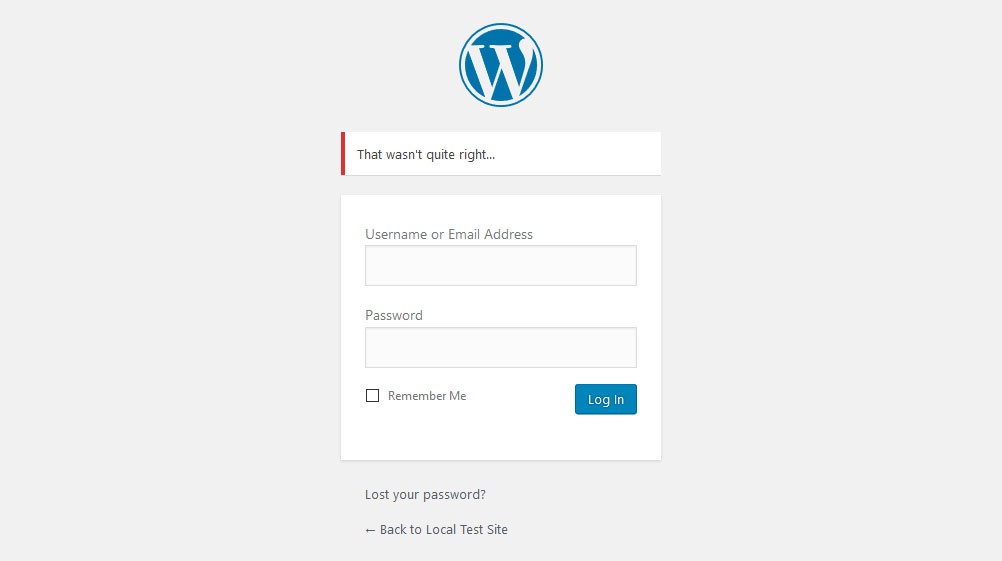
Unfortunately, this can make it easier for hackers to get into your site. For that reason, you can use the code snippet below to change the error message to something less revealing.
function obscure_login_errors(){
  return "That wasn't quite right...";
}
add_filter( 'login_errors', 'obscure_login_errors' );
Just change the text between the ” ” to whatever you want the message to say.

3. Display the number of words in an article
Sometimes it’s useful to show the number of words in your posts. That way, visitors have the opportunity to decide whether they want to invest their time into the entire article or not.
First, add the following to your functions.php file:
function word_count() {
    $content = get_post_field( 'post_content', $post->ID );
    $word_count = str_word_count( strip_tags( $content ) );
    return $word_count;
}
The code above strips the HTML tags from your content and then counts the leftover words.
After that, you need to add echo word_count(); wherever you want the number of words to show up. For example, I added the following line to the entry meta section of my post template.
echo '<div class="word-count">This post contains ' . word_count() . ' words.</div>';In the code above, we wrapped the number of words in an HTML section (in order to change its appearance if necessary) and added some text around it. The actual number is displayed where it says word_count(). The command echo simply tells the browser to display everything on the page.
After that, we looked into out child theme (it’s important that you use a child theme) for the file that is responsible for displaying posts on my site. In Twenty Seventeen, that is content.php, which is located in the theme folder under template-parts > post. However, it will probably be different in yours.
To find out which template file your theme is using, you can install the What The Fileplugin. It will display which file and template parts are used for displaying the page or post you are currently on.
Finally, we simply located the entry-meta section in my file and pasted the code right before the section closes. In Twenty Seventeen, that ends up looking like this:
echo '<div class="entry-meta">';
       if ( is_single() ) {
               twentyseventeen_posted_on();
       } else {
               echo twentyseventeen_time_link();
               twentyseventeen_edit_link();
       };
echo '<div id="word-count">This post contains ' . word_count() . ' words.</div>';
echo '</div><!-- .entry-meta -->';
Here is the result:

4. Add estimated reading time to posts
Instead of showing the word count, you can also go one step further and display the estimated reading time. To do this, you just need to add some extra code to the example above:
function reading_time() {
    $content = get_post_field( 'post_content', $post->ID );
    $word_count = str_word_count( strip_tags( $content ) );
    $readingtime = ceil($word_count / 200);
    if ($readingtime == 1) {
      $timer = " minute";
    } else {
      $timer = " minutes";
    }
    $totalreadingtime = $readingtime . $timer;

    return $totalreadingtime;
}
What this snippet is take the number of words and divide it by a reading speed of 200 words per minute (that happens where it says $word_count / 200, simply change this number if you think your readers might be slower or faster). It then outputs the results with minute or minutes at the end.
You can add it to your site the same way as the word count in the last example. The only difference is that you replace word_count() with reading_time() in your code. Here’s how we did it:
echo '<div id="reading-time">This post will take you about ' . reading_time() . ' to read.</div>';And this is what it ended up looking like on the page:

5. Delay posts from being sent to RSS
Our final example is a way to keep posts from immediately going to your RSS feed when you hit Publish. That can be a good idea because it gives you time to correct those typos you only see once you have already sent the post out to the world.
The problem: while on your site you can simply change any mistakes, once your post is out on RSS, it’s out there. However, no longer! Use the snippet below to keep this from happening.
function delay_rss_feed($where) {
       global $wpdb;
    if ( is_feed() ) {
        $now = gmdate('Y-m-d H:i:s');
        $wait = '10';
        $device = 'MINUTE';
        $where.= " AND TIMESTAMPDIFF($device, $wpdb->posts.post_date_gmt, '$now') > $wait ";
    }

    return $where;
}

add_filter('posts_where', 'delay_rss_feed');
In this example, the number of minutes the post is delayed by (the part after $wait) is set to 10. Feel free to change it to whatever timing you find appropriate.
In Conclusion
The WordPress functions.php file is a powerful tool to make changes to your website. If you know your way around it, there is little you can’t do.
Above, we have explained what the WordPress functions.php is, what it is used for and its advantages and disadvantages. We hope that this article will be useful for you!


