If you have ever browsed the world wide web, we are sure that you have some experience with donate buttons. Many bloggers and non-profit organization use the simple system that allows them to raise money for a particular cause. Some bloggers even use the button to allow the readers to pay them any amount of the green ones in order to support them. Have you seen those sites where admins ask for a cup of coffee? We think it is a nice way of earning a few extra bucks that will help you pay for hosting and other blogging expenses.
When considering a donate button, the majority of users turn to PayPal. It’s obviously one of the most popular paying methods that also works perfectly with donations. You just need a free business account.
In today’s article, we will show you how to manually add a donate button with PayPal.
Create a PayPal business account

You will need a PayPal account. The money that hopefully people would be transferring to you has to go somewhere. So let’s do the first step and create a PayPal business account. If you already have one, just skip this.
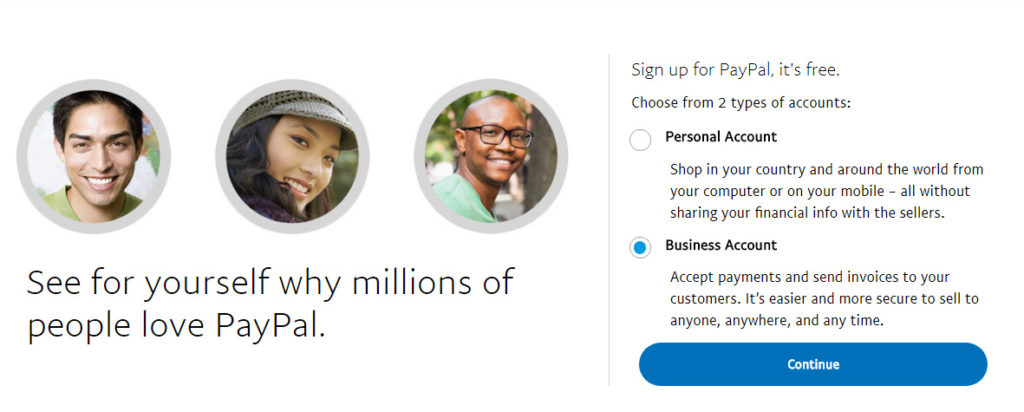
- Go to PayPal
- Click “Sign Up” button on top
- Select Business Account and click Continue
- Click Select Standard button
- Fill out your business information
You can now edit the account in more details if you want to. Add a photo of yourself, link a bank account or credit and debit cards if desired. We will leave this up to you, but you are now ready to start adding a button to your site.
You can quite easily copy the generated code directly from PayPal:
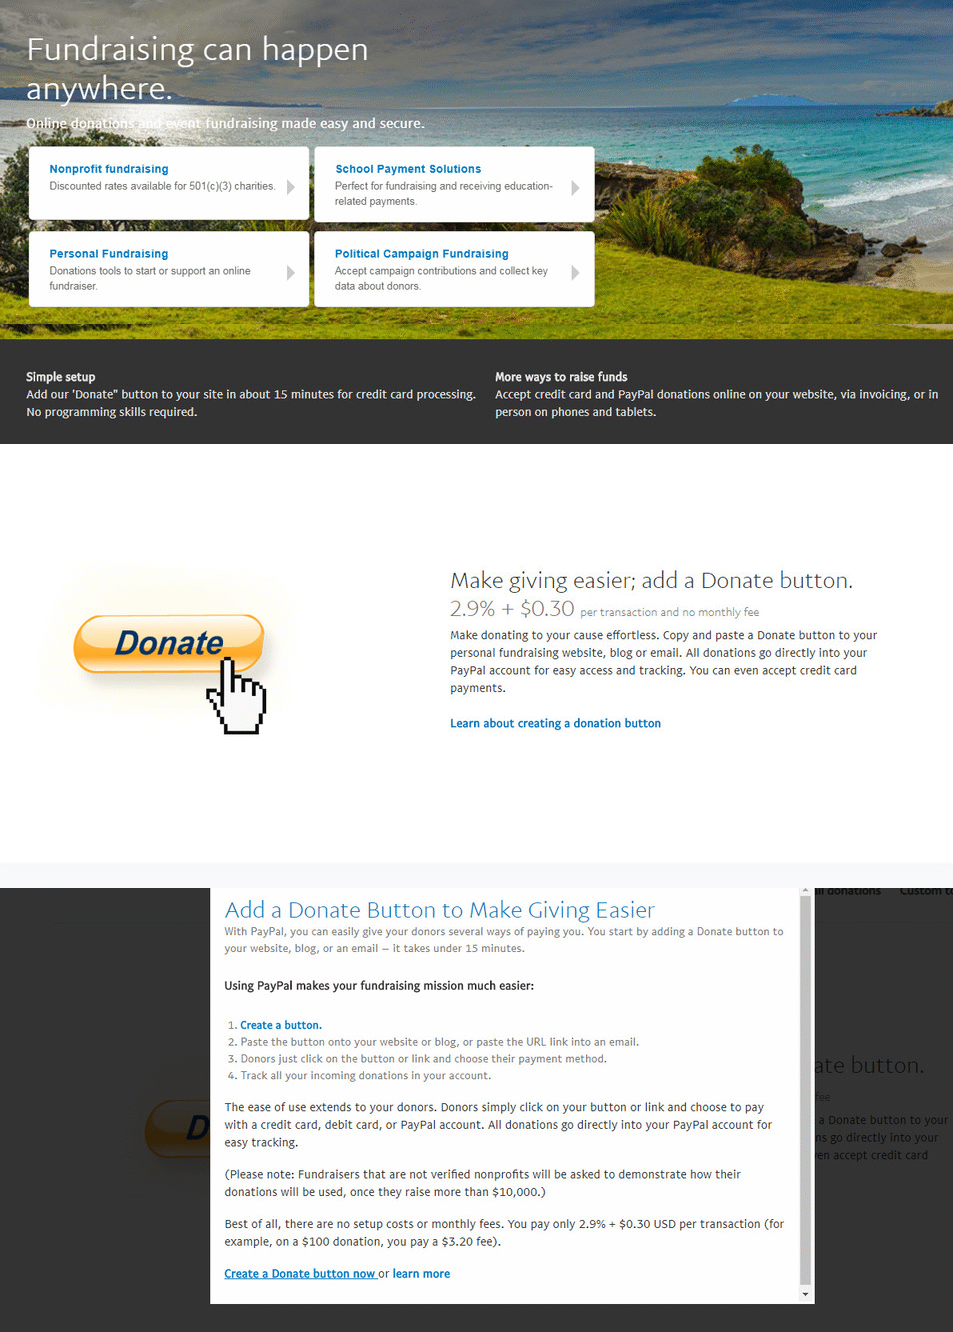
- Go to Paypal’s Fundraising Page
- Pick a category: Non-profit, political, school, personal
- On the next page, find the image of a button and click on “Learn about creating a donation button” link
- In the new window, click “Create a Donate button now”

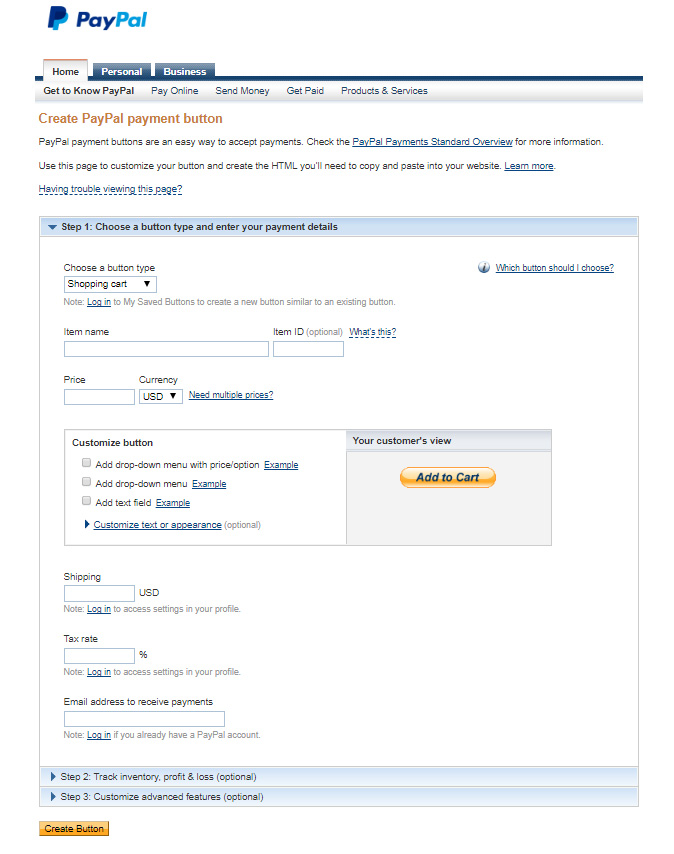
Even without having to sign in to your PayPal account, you will be now able to customize and generate a button for your website. Take your time and browse through all the options. Change buttons, add custom titles and optional text, change language or even upload a custom image for the button.
If you want to make everything right from the very start, we suggest that you do log in to your PayPal business account.
By logging in, you will get a chance to protect the donation system with your merchant ID or email address. In addition to the protection, you will get to track inventory, profit, and loss, and also customize some advanced features.

- Once you’re happy with the settings and the look of your donate button, click “Create Button”
- Select and copy the generated code
- Navigate to any post, page, widget or a template file where you want the button
- Paste the code there
For the purposes of this tutorial, let’s add the button to a Text Widget:
- Navigate to Appearance -> Widgets
- Select a Text Widget and move it to any widgetized area you want
- Paste the button code in the widget
- Add title if you want
- Save changes and preview your site
In Conclusion
We hope that this article will be useful for you. Whether you are raising money for business, school, political candidate, a particular cause or you just want people to compliment your work, you will need a simple way of adding a donate button to your WordPress site. As you could have seen from the article, it is not that hard to add one manually by copying the code from your PayPal account.


