WooCommerce is a full open-source e-commerce plugin for WordPress from the guys over at WooThemes. It offers a stable and secure platform built right on top of the WordPress Core making it easy to customise to your needs. Launched just over a year ago it has already reached nearly half a million downloads and is fast becoming the e-commerce plugin of choice for many WordPress developers, me included.
WooCommerce adopts a “freemium” style approach, the core plugin is offered completely free however some of the extensions for WooCommerce are sold at a fee. This model works quite well as it allows you to get up and running with what is a feature packed plugin which will suit the majority of users and charging for more complex extensions such as additional features and payment gateways. I’ve personally built a number of sites using WooCommerce over the last year and have only found myself in need of a “premium” extension on a couple of occasions.
Without further ado let’s jump in and get started, I’ll only be looking at the core plugin initially to try and show how easy it is to get started using the open-source plugin.
Installation and Initial Setup
Installation is just as easy as any other WordPress plugin. You have 2 options:
- FTP/SFTP Upload
- Visit the WooCommerce Plugin Page on the WordPress.org Plugin Repository and click download. This will download the latest version to your local machine.
- Extract the downloaded zip file using your application of choice.
- Connect to your WordPress site via FTP or SFTP (SFTP FTW!) and navigate to
wp-content/plugins/. - Upload the extracted woocommerce folder to
wp-content/plugins/.
- WordPress Dashboard
- Login to your WordPress site Dashboard.
- Navigate to Plugins -> Add New.
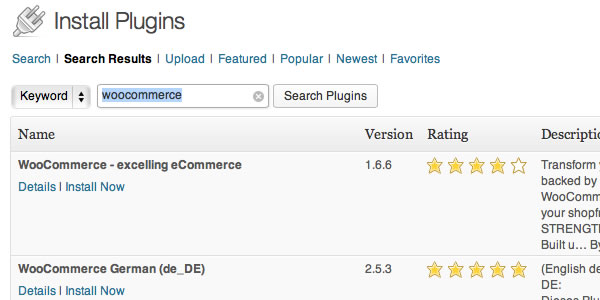
- Search for “WooCommerce”.
- The top result should be “WooCommerce – excelling eCommerce”. Click install now.
- Depending on your setup you may be prompted for your FTP username and password.
- Plugin Activation
- If you uploaded your plugin via FTP/SFTP you now need to navigate to “Installed Plugins” under your WordPress Dashboard. Find WooCommerce in the list and click on activate.
- If you downloaded the plugin via your WordPress Dashboard you should see “Successfully installed the plugin WooCommerce – excelling eCommerce 1.6.6.” (The version may be different depending on when you are reading this!), underneath simply click Activate Plugin. (If you have already navigated away from this page you can simply follow the above step, navigating to your Installed Plugins page to activate.)
- Pages Setup – You should see a nice magenta banner “Welcome to WooCommerce – You’re almost ready to start selling :)”. WooCommerce needs some pages to be created for it to function, it can do this automatically for you by simply clicking “Install WooCommerce Pages”. (You can change these page names later if you want to).

That’s it WooCommerce is installed! You should now be looking at the WooCommerce settings page. This is where you will be configuring your store. Let’s go through the initial settings.
General Settings
The first thing we need to do is setup where we are and our currency. These are simple dropdowns and you also get a third dropdown to allow you to limit which countries you are willing to ship to. You currently can only set one currency, which might be an issue for some international sellers, however there is an extension to show dynamic currency conversions in your store using the Open Source Currency Exchange API. This will only serve as a guide for your visitors as payment will still be taken in the base currency you set under general settings. It is also a paid extension.

Next we get some Checkout and account options. Here you can configure things like enabling guest checkouts (so they don’t need to register an account with your site), you can force SSL on checkout pages (particularly useful if your payment gateway requires this), if you want to enable coupons (more on this later). You can also set some account functions like allow user registration without an order, whether to use email addresses for usernames and if you want to hide the WordPress Admin from customers. Most of these are personal preference and you can add and remove these options whenever you like. The default options are a good place to start and I always disallow customer access to the WordPress admin.
Further down we have some options for styling and scripts. You can enable the default WooCommerce CSS and customise it from here or turn it off completely. We’ll go into more detail on this later. You also get a couple of UI options including quite a nice Lightbox effect which I usually enable.
Finally on this page we see our digital downloads options. With WooCommerce you can easily sell virtual and downloadable products these options allow you to define how they should be handled and how to grant access. The options are pretty self explanatory as with most of the WooCommerce setup.
Catalog Settings
Most of the options are easy to understand, one definately worth a look is the “Show subcategories”. These three little checkboxes can really affect your look. Check these boxes and your main store page will show your categories instead of products. This is really useful as it gives much more of a e-commerce feel, with lots of products simply having the products shown can make navigating your product categories quite difficult as you have to rely on the WooCommerce widgets.

Product data is also one to watch, it gives you the option to show or hide some fields on your products, it is up to you to decide if you need these fields and to enable/disable according to your needs. Likewise hiding underneath is the ratings options. Again whether or not to allow product reviews is your personal choice, but it is nice that WooCommerce gives you the option to turn it on or off.
Skipping to the bottom we see the Image options. Here you set the image dimensions of your products, these are essentially the image sizes for the Products custom post type WooCommerce creates for you. Catalog images are your archive style pages with single product images and product thumbnails being exactly what they say they are. If you do change the image sizes after adding products you will need to regenerate your images using something like the Regenerate Thumbnails Plugin as like all WordPress media the extra image sizes are created on upload based on these settings.
Other Settings
I’m going to speed through some of the other settings here as most are fairly self-explanatory. I recommend you setup a local WordPress site and have a play with WooCommerce to check out the different options.
- Pages Settings – Remember during our plugin activation we created some pages? Well it is here you can change them. You can simply update the already created pages (found along with all the other pages you have on your site) or you can create new pages and link them from this page. You can also change your shop permalink structure from here although I have never found the need personally.
- Inventory Settings – Another small and simple page. Basically do you want to enable stock management or not? If you do you get a few options on what to do about low stock etc.
- Tax Settings – From here you can define your tax rules with multiple tax classes and local tax rules. Particularly useful actually especially for international selling. As with all the settings you will either need it or not and switching it off is as simple as a checkbox.
So hopefully we have WooCommerce installed and we’ve been through our intial setup. There’s still a little bit of work to do before we can start adding our products though.
Setting Up Shipping
Out of the box WooCommerce comes with a range of shipping options and even gives you the option to switch it off completely if you are dealing with downloadable or virtual products. The core shipping options allow you to set fixed rate costs for domestic, international and local delivery and allow you to specify different classes like Next Day, Priority Delivery etc by using what are called shipping classes. You can easily set which countries and areas qualify for your different shipping methods and you should be able to get your store up and running using these basic methods.

Let’s setup a shipping method. So for my store I want to charge a flat fee for all deliveries to the UK and then a flat fee for international shipping. From my shipping options I have disabled all but “Flat Rate” and “International Shipping”. On my main shipping options page I have ticked “Enable Shipping” and “Hide shipping costs until an address is entered”. I don’t want the shipping calculator to be shown so have unticked this (this is more for use when you have complicated shipping rules and charges in place). Now I don’t mind shipping to a seperate billing address so I’m allowing that, however I am setting the billing address as the default shipping address. You can see my setup below.
So now onto the charges. So firstly my flat rate; I’ve enabled it and changed the “Method Title” to UK Delivery (this is what is output on the front end). For my method availability I have set it to specific countries and specified United Kingdom in the box below. On people with a shipping address within the United Kingdom will be able to use this shipping method. Next I have set the “Calculation Type” to Per Order and left it as Taxable. My Default cost is set to 4.99 I’m not charging a handling fee.

Now for my International Shipping. I’ve enabled it, the default name of “International Delivery” makes sense. Now for availablity I’ve this time set it to “Excluding selected countries” and then entered United Kingdom. Everything else is the same as for UK delivery except the price which I have set to 7.99. Now anybody ordering with delivery to a UK address should see the United Kingdom Delivery price and anybody with a delivery address outside the United Kigdom will see our international price.
Setting Up Your Payment Gateways
Okay, initial setup is done. We have our shipping methods setup. Now we need to actually get some money from our users! As with the shipping methods you get a few basic payment gateway options out of the box. Most of them completely pointless for most e-commerce stores, things like Direct Bank Transfer, Cheque, Cash On Delivery. What you do get is PayPal which should be fine for most people starting out and Mijireh Checkout. Mijireh is payment processor that has partnered with WooCommerce hence why it is included for free. Mijireh Checkout provides a fully PCI Compliant, secure way to collect and transmit credit card data to your payment gateway while keeping you in control of the design of your site. Mijireh supports a wide variety of payment gateways: Stripe, Authorize.net, PayPal, eWay, SagePay, Braintree, PayLeap, and more. Obviously you need an account with one of the supported payment gateways and as well as the charges you will incur from your gateway you will also have to pay a $0.50 transaction fee to Mijireh. I’ve not used this myself as with the shipping extensions you can purchase additional payment gateway modules and prefer a small one of cost rather than a recuring charge. The choice is yours.

For our tutorial let’s start with PayPal setup. No surprise it is simple to setup! Enable it enter your PayPal email address and you done. You get a few other options you can tweak like invoice prefixing for PayPal and you can specify your PayPal page style. You can also enable or disable PayPal sandbox mode (it is enabled by default) brilliant for testing your store beofre you go live! That’s it Payment gateway is probably the easiest bit of the whole setup.
Conclusion
So we have WooCommerce installed and our initial setup is complete, that wasn’t too painful now was it? We’ve setup our shipping methods and also setup our payment gateways all with very little time or effort. In our second article we will go through adding some products and talk about the different product types WooCommerce offers, we’ll have a look at how to style and theme WooCommerce and discuss next steps for extending WooCommerce.
Related Posts

How To Set Up WooCommerce Coupons
Coupons are a great way to thank existing customers and to acquire new customers. It also allows you to create custom codes that you can easily share online, in newsletters, or personal emails to clients as a thank you. To add a coupon go to WooCommerce > Coupons Coupon Date General 1. This is the code that […]
Read More
How to Manage Orders in WooCommerce
In order to manage all the orders on your Online Store WooCommerce provides you with a dedicated page where all the orders will be listed. In the next few lines of this tutorial we will show you how to fully manage the orders submitted for products purchse on your Online Store. Add a New Order […]
Read More
Every store wants to be unique and convenient for customers. No matter what you sell, books or cars, your website should be beautiful and easy to use. There are many tools for creating a store style. One of these tools is the grid / list view for your products. This is very convenient for customers, […]
Read More
Product Preview. How to add it into your site?
How often do you looking for something from products in online store? How many products you are look? Many products, many pages and so lazy to open each product in new page. Do you know this lazy feeling? Sure, if you just a site visitor, you can’t anything do with store, but if you are […]
Read More